Monday, August 15, 2011

Another quick update

I shot a lite coat of Tamiya clear gloss to seal the decals, and prepare the model for weathering. I then used a thin pin-wash using Mig Dark Wash and Brow Wash i all the seams and crevices, and removed the excess wash after it dried with thinner. The model was looking pretty dark at this point, so I shot it with a light coat of Testors Dull-coat, which lightened it up a good bit. and now it's ready for weathering in earnest.


I also took the opportunity to start painting the figures. I decided to go with the 3 half figures by AB Figures. Th figures are about done, just a little touch-up and highlighting to do before they are done.


Saturday, August 06, 2011

Decaling Derby

I started decaling "Derby" this morning. One word of warning if you are anal like me, Dragon didn't get the decals completely correct. I used the 2 pictures of Derby from the Concord books as the primary reference, along with Jim Lewis's Derby build mentioned previously. Most of what you need is on the kit supplied decal sheet, Dragon just doesn't show you were to put everything, and you need to cut up the extra decals to get them correct (or close to correct). I ended up using decals from 2 Dragon M4A1 Normandy kits, a Dragon M4A1 76 Op. Cobra kit, and lastly some Archer US stars. You need the second Derby Decal for the "D-32" decal on the turret bustle rack, and the Cobra kit for the unit marking 2Delta67Delta (the Cobra kit decal is a close 2Delta66Delta).


I've also picked out some AB Figures from my stash to use on the kit. I'm not sure if the co-driver will be sitting outside the hatch or just have his head visible or not, so I picked one of each.


Oh well that's it for now. I still have a few decals to cobble together before I give it another coat of gloss.

Wednesday, August 03, 2011

Another quick update

I decided to do more than a little touch-up on the camouflage job. I didn't like the sharp demarcation line between the od and black. It didn't really match the pictures of other camouflaged Shermans that I have. So I loaded up my trusty Iwata HPC with some thinned Tamiya mixes and carefully work on the transition between the two colors freehand. All in all, I think it turned out pretty good.

I also took the time to paint most of the stowage using various Vallejo Game Colors. First I painted them Dead Flesh for the greens and Bone white for the Khakis. I then used Vallejo thinner and glaze medium, mixed with Cayman Green lightened with the Dead flesh for the green mid-tones, and Khaki for the khaki mid-tones. Finally I gave everything a quick coat of Vallejo's new Washes Green and Sepia on the greens and just Sepia on the khakis. I really love this stuff, it makes things really pop, lightly coats everything and really settles down in the folds. I'll definitely be experimenting with this stuff in the future.


Friday, July 29, 2011

Coming along

Derby apparently was camouflaged, although I couldn't tell from the one picture I have of it. Dragon would have you use od and earth brown, but most of the reference I have seen say the 2nd Armored Division used od and black. So I used the blu-tack trick I tried out on the Stug IV and Jagdpanzer to mask off the camouflage of the OD areas so I could spray the black. must confess I copied the pattern from another modeler, Jim Lewis, has a 1/35 scale buildup of Derby om his website, Guntruck. I particularly liked the camo pattern he used on his Derby build, so I copied his. I still have some touch up to do, but I'm pretty happy so far.


As for the Horch I laid down a coat of Tamiya German Grey lighted with a paler grey. I also found a great online reference Vincent Abbott's Smugmug site has a great album with 100 shots of the Horch, and will be a great resource for the second kit.


Sunday, July 24, 2011

Derby and something new

I managed to get Derby to the point where I can start laying some paint down. I shot an initial coat on the tank using the "Zologa formula" U.S. O.D. (ie, Tamiya XF-72 & lightened with XF-60). I've got a lot more painting to do, but I'm happy with the results so far.


I also started work on a new kit: Dragons "Heavy Uniform Personnel Vehicle Type 40." Why Dragon chose to name it that is a mystery to me. I guess some other automaker must own the rights to "Horch" and Dragon must not want to get into a copyright/trademark fight. I've got mixed feelings about the kit, it's only made up of about 54 parts, and assembles very quickly into a reasonably nice looking kit. Dragon also gives you two kits in the box, which is good. I decided to build one "out of the box," well as out of the box as I can build it. I'm probably going to replace the cloth convertible top with one made of 2 part epoxy.

I have almost zero references on the Horch. I guess this gives me an excuse to buy the WWP book :). From what I've been able to find on the internet it looks like Dragon did a good bit of over simplification, but otherwise produced a kit that looks like the real vehicle. I'll probably also add some stowage clutter to the rear storage bin, and maybe add a Preiser figure or three.


Monday, July 18, 2011

Small Derby update

Just another small update on my M4A1, "Derby." I managed to glue the siren to the bracket, and the bracket to the hull without getting too much super glue on anything. Dragon actually includes a bracket on the PE set included in the kit but it didn't look dimensionally correct to me, so I scratched it. I'ce also carved off the lower half of the periscopes on all the hatches, replacing them with a bracket made of aluminum beer can.


I've also added the tools to the back of the tank, adding a little more detail to the kit parts. Dragon's tool layout doesn't look like most of the pictures I've seen of M4A1's, but it appear to be correct for Derby. You can just make out the sledge hammer in the picture in the Concord books, so I went with Dragon's layout. It's probably a case of Dragon getting it accidentally right, because there are so many other details they got wrong on Derby.


That's it for now, I've got a club meeting tomorrow and should probably have something to bring.

Monday, July 11, 2011

A Small update

Shamefully I've done very little modelling the last few months (other than expanding my stash), jumping from one project to the next with the attention span of one of my nephews. One of my problems has been taking the time to finish a model, getting bogged down in small details, which is getting a bit ridiculous for 1/72 armor...but for me it's all in the details. The M4A1 75mm "Derby" is a perfect example. Derby has lots of interesting little details, and the latest for me to get stuck on was the siren bracket that was typical of Sherman's in the ETO in the summer of '44. I was debating making it in Evergreen strip or sheet brass without actually making it.

This past Sunday I was at the monthly Washington Armor Club meeting, and one of my buddies (one of the only other braille scalers in the club) put out a few of his finished recent projects, and mentioned one of his favorite scratch building materials....beer can aluminum! Well it's pretty hot here in DC (several straight days in the mid to high 90's), and a beer can conversion sounded perfect to me. So a very recently emptied can of Yuengling sacrificed itself, and after about 1 hour I had finally crafted the siren bracket. Ok that's it for now, back to modeling.


Wednesday, March 16, 2011

New Tool

Just a brief update, I ordered a couple of Punch and Die sets from UMM that arrived today. One is a set of round punches in 6 sizes(0.6, 0.8, 1.0, 1.2, 1.4, and 1.6 mm) ...


...and the second is a set of 4 hex punches (0.8, 1.0, 1.2 and 1.4mm).


I've have a Waldron Punch and Die set for 25+ years, and it has served me well (and will continue to). The UMM round set has several sizes that bridge some size gaps, and the Hex set was something I've always wanted. It probably won't be very useful from braille scale kits, but the .8mm punch looks like it will come in very handy for 48 scale Sherman's, and the larger sizes look great for 35 scale kits.

I was a little concerned about the design of the sets., but they appear to work just fine to me. I've included pictures of some .010 plastic that I punched out.

Tuesday, March 08, 2011

Oh my!

It's almost been a year since I've posted anything. It's not that I haven't been building anything, I just haven't felt like blogging about it. My modelling interests have been straying away from braille scale armor subject too. So I think I'll start posting about whatever is currently catches my modelling fancy.

Fist up, a friend has been bugging me to share pictures of the finished Cromwell. I've competed it at a couple of shows: my own IPMS club's MarauderCon and 2010's IPMS Region 2 show, and placed in both. I might bring it to this years AMPS, I might not. It depends on how long I plan to stay at the show.


...and just to prove I haven't abandoned braille scale altogether, here's my Dragon M4A1 which I'm modelling as Derby. A 3rd Armor Tank from Normandy. The "big" progress I've made is adding the rucksacks to the turret. I've got a few more tidbits to add to the turret before I start painting. Missing from the picture is the pile of stowage that sits on a pallet strapped to the back of the tank.


Now is when I start to stray from the braille scale a little. After working on the Tamiya M4, I caught the 48th scale bug, and I've been picking up various 1/48 scale armor kits. Here is the Hobbyboss KV-1 "Ehkranmi." A vary nice kit, and a scaled down Trumpeter KV-1 from what I've heard. It was a lot of fun to build, and went together without any major problems. It's basically out of the box, although I did add an RB barrel (the bore of the kit part was off center) and some PE engine grills by Hauler.


and then I stray a little further. I've had the 1/35 Skybow Beep on the shelf for years. Well now it's in my build pile. I've downloaded the Tech Manuals (available for free on the internet archive) and plan to wire it all up. So far I've got most of the engine wired. I tride using brass and lead wire, but ended up using stretched spue (a lot easier to glue).


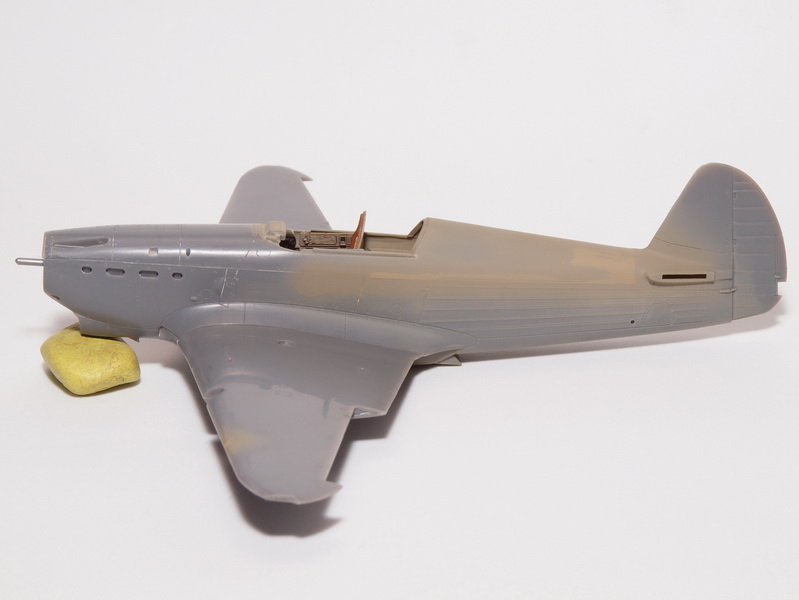
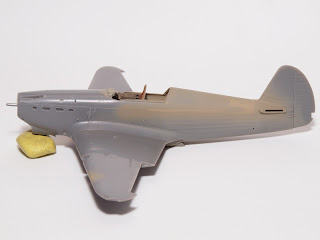
...andthen I really start to stray! Back to my first love 1/48 scale WWII Aircraft....well really any aircraft. I just took pictures of the Accurate Miniatures Yak-1. A really nice kit, although I hear it's got some serious shape issues because they tried to make too many Yak varriants out of it. It doesn't matter to me as it's such a nice kit, that looks the part enough for me. The build is basically out of the box, with the exception of seat belts that I made from lead foil.


I've been working on lots of other aircraft that I'll probably post later, as well as some 28mm War Gaming figures, that I'm primarily using to try and improve my figure painting skills. Oh well that's it for now.