Now on to the Tiger I. I don't have any pictures to post at the moment. I stumbled across another picture of Tiger 100 taken while it was on display in Moscow. This picture is shot from above and behind and clearly shows that engine deck and top of the turret. I based my top of Tiger 100 on a Tom Jentz's Tiger I Modification list as wheel as a friends copy of Germany's Tiger Tanks D.W. to Tiger I: Design, Production & Modifications. Well, I got the engine deck wrong, and need to re-do it. The picture clearly shows that the opening for the air cleaners is there, and not sealed over. You can also see that there are FOD screens on the air intakes. I've gone ahead and order the book "the pictue" came from (along with several other books). Hopefully it won't take to long to ship from Avia Press in Russia. There are a lot of other details I want to check out, hopefully the pictures in the book are sharper than the ones on their web site. I've also refered to David Byrden's excellent Tiger I site.
I've also order a care package from Jadar in Poland. Among other things I've ordered the Aber 8,8cm KwK 36 gun and the Part Tiger I Ausf.H photo etch set, along with a few other thing. ;)
Here's a list of modifications I've come up with to build an "accurate" Tiger 100, after it was captured by the Russians.
The Turret
- Assymetrical Turret - I'm seriously debating this.
- Storage bin on right side of turret.
- Straps for bin lost from the right side of the turret.
- Smoke mortars - three on the left, two on the right.
- Lug and four pads for missing rear turret basket.
- Armored air intake on top of turret.
- Welded prop for the Commander's hatch.
- Sun shade over gunners sight.
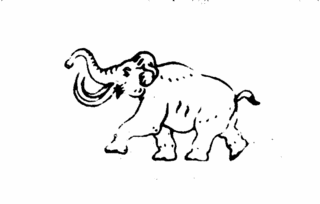
- Elephant and ",100" decal.
- Early style gunner / loaders hatch
The Chassis
- Mirrored Tracks - I might pass on this one, but I have sanded off the ice cleats.
- sand off all tools and tool mounts.
- Early style front fenders.
- Spare track rack on front of tank.
- Wing nuts on hull machine gun mount (for water-proof cover).
- Drivers side periscope holes above the armored site (partially covered by armoured site).
- Horse shoe.
- Small elephant emblem on upper right corner of front glaciss.
- Headlight brackets and wire fittings
- German crosses on chassis sides.
- Spare antenna holder along top right rear of chassis.
- Prominent weld marks on the chassis sides.
- Early style exhausts eith flapper vlaves.
- Large antenna mount on right rear glaciss.
- Rear fender brackets.
- Add tie-down fittings for missing tools to the rear glaciss (the locations are different from the molded on tools).
- Air intake screens.


